

Saving snapshots to Cloud Pods
In the previous section you learned how to save a snapshot of the emulator’s state to a local file, then to re-load the snapshot into a different emulator instance. When working in a team environment, it’s important to have a standard mechanism for sharing snapshot files amongst your team, and for managing updates when new versions are published.
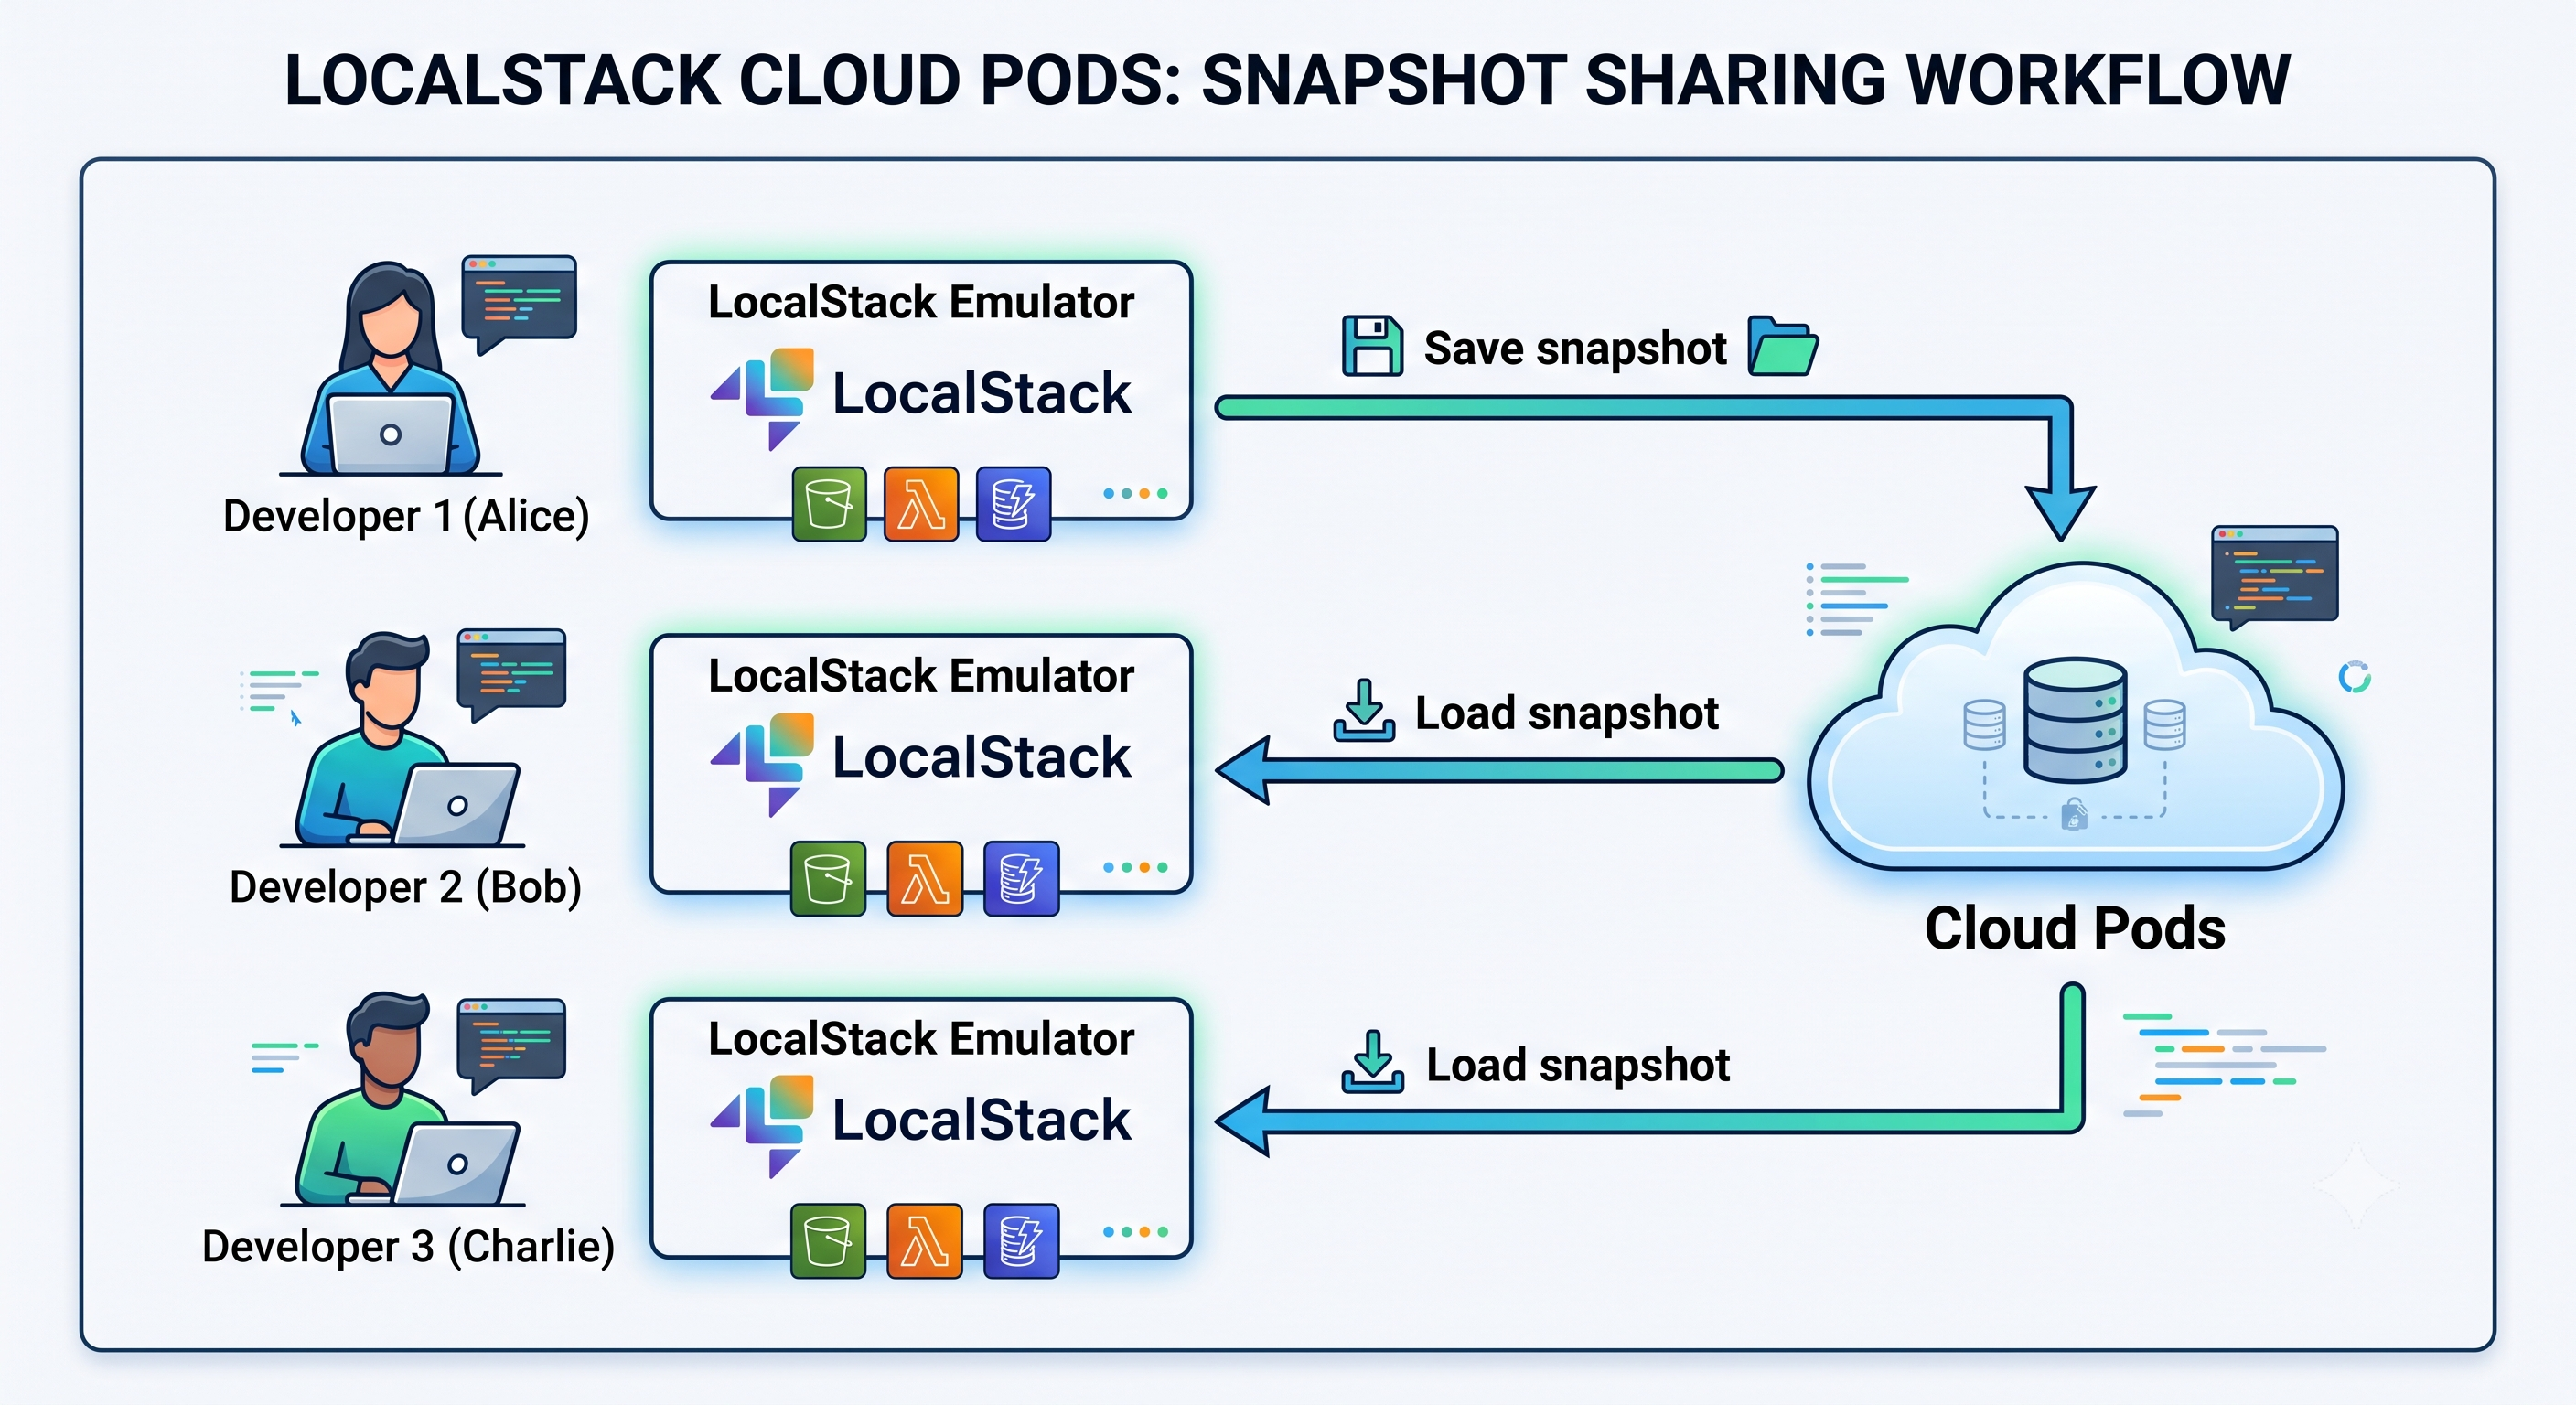
LocalStack provides the web-based Cloud Pods repository for exactly this purpose, accessible only to the users in your organization. Snapshots are generated by an emulator instance, then automatically published to your Cloud Pods repository. From there, snapshots can be loaded back into an instance, either on a desktop environment or a CI environment.
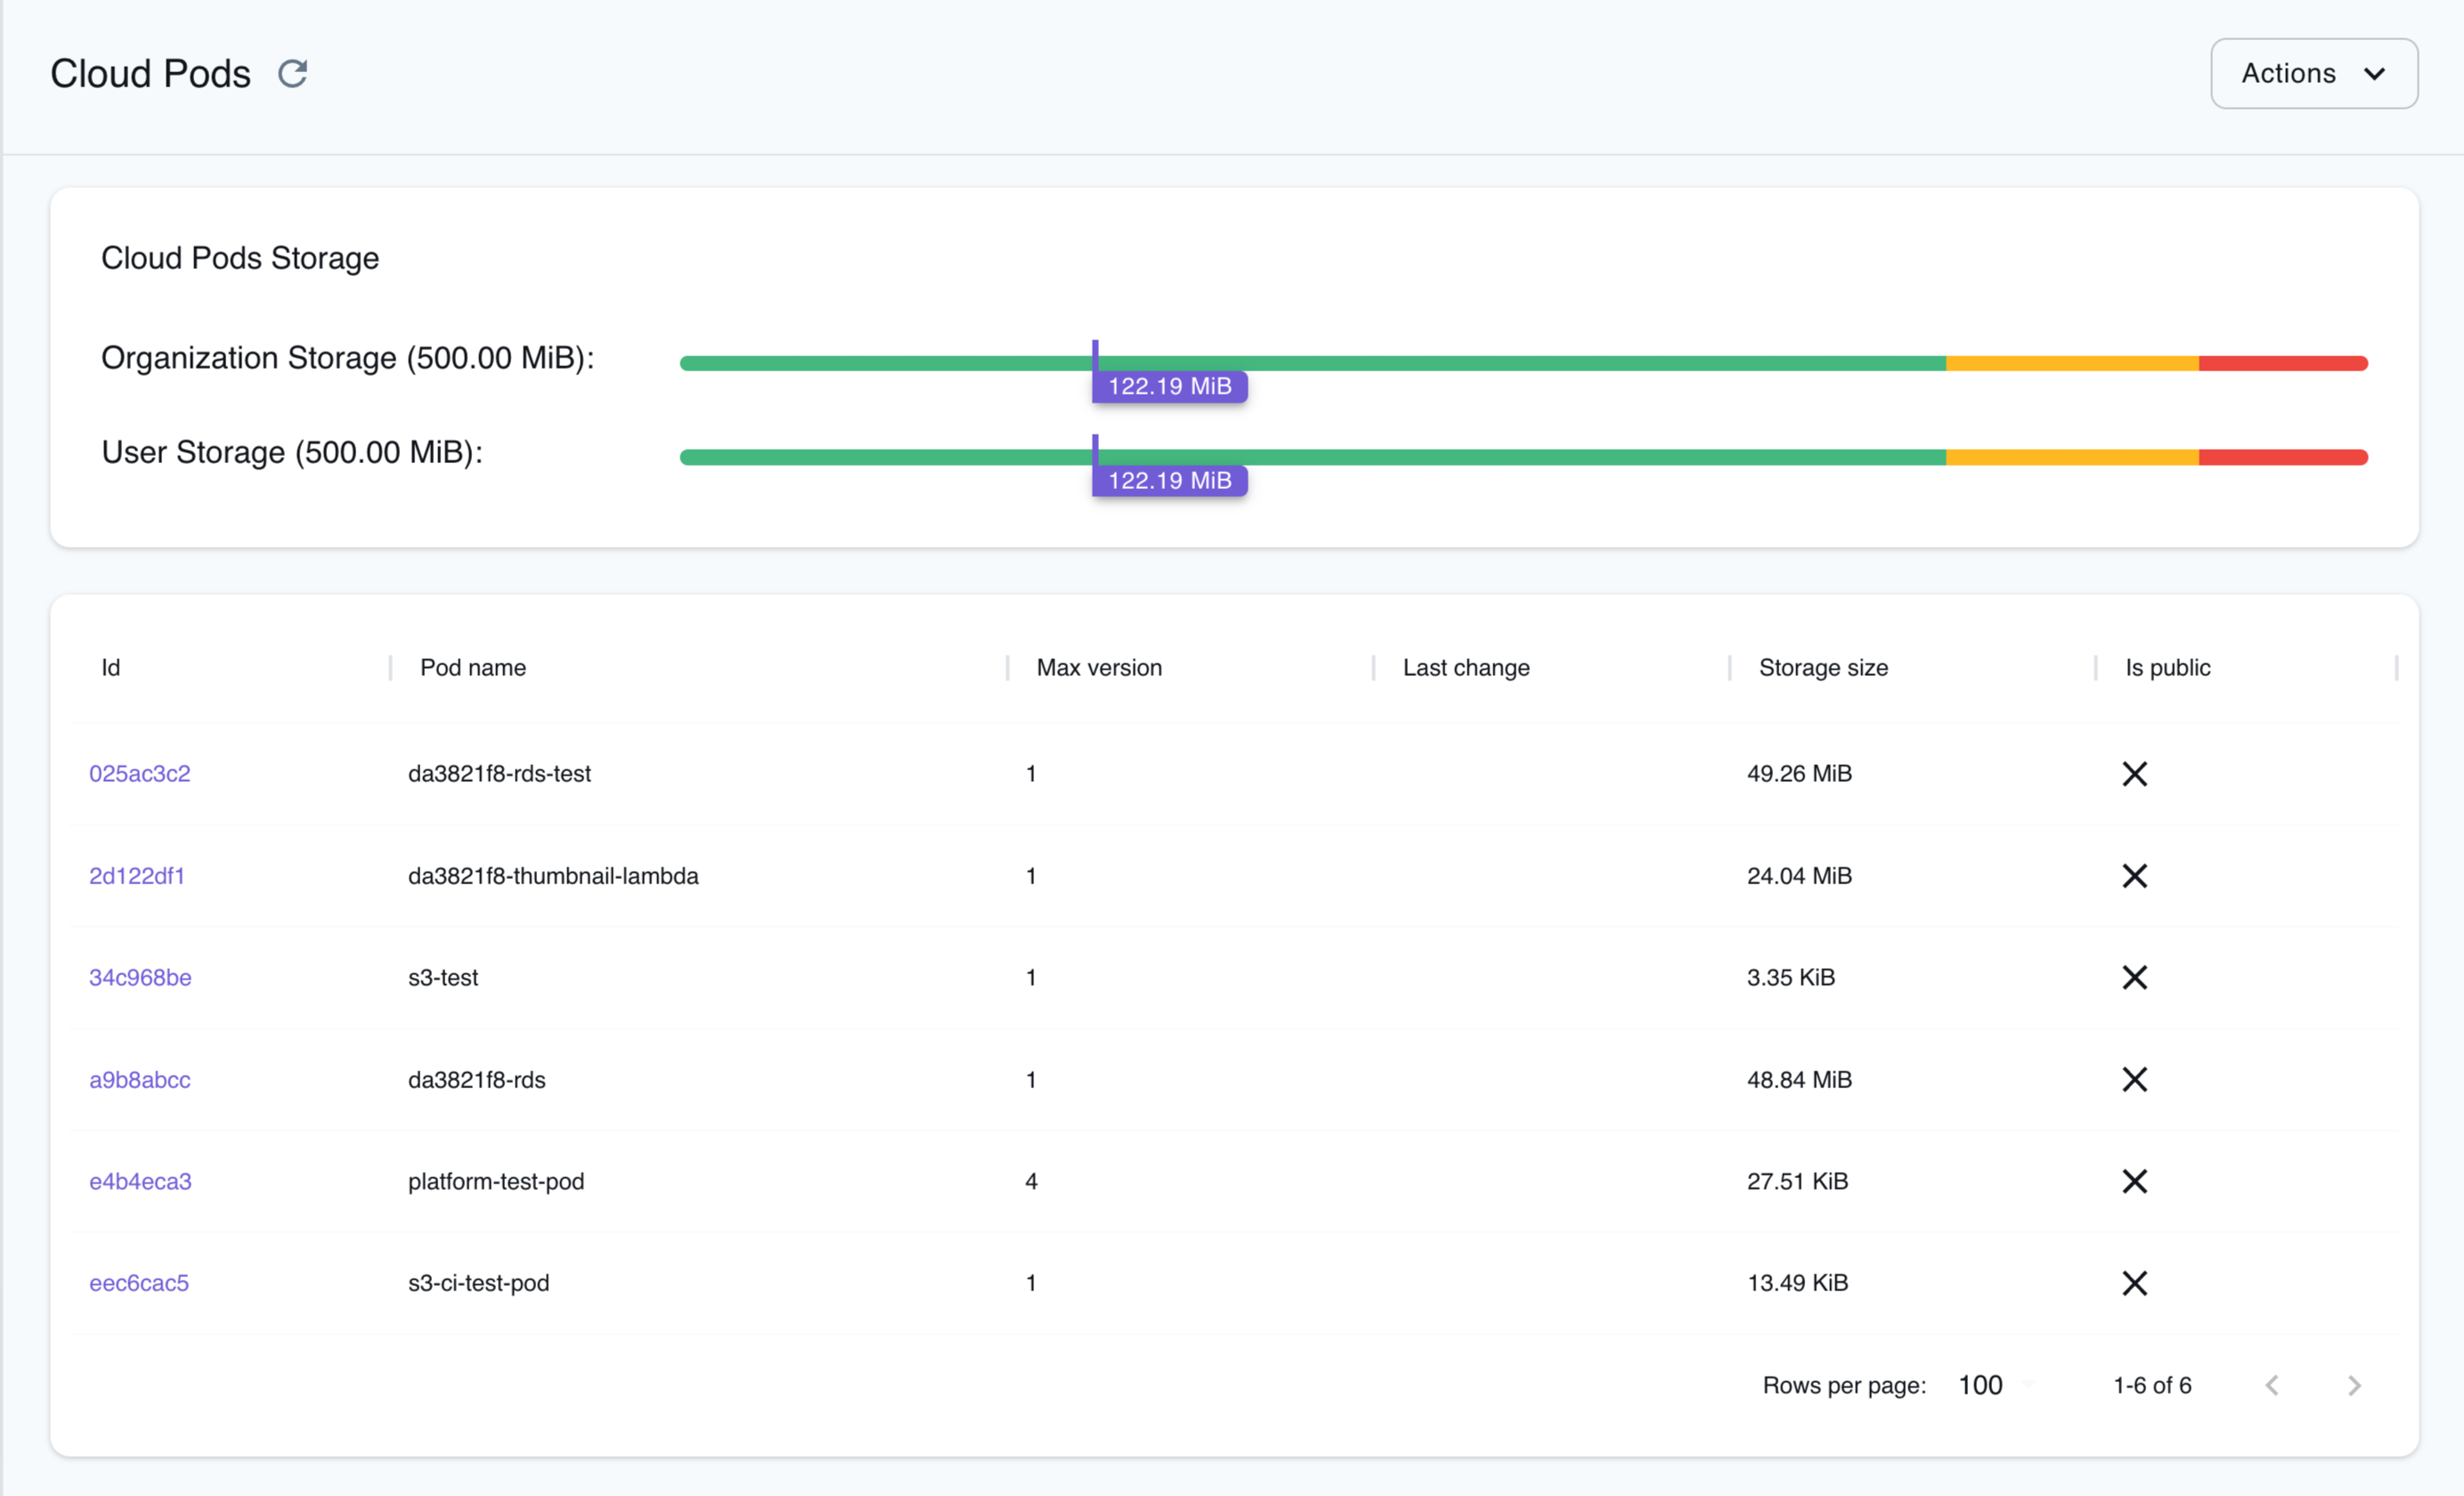
Each organization has its own private Cloud Pods repository, securely managed in LocalStack’s cloud. These are backed by dedicated, isolated Amazon S3 buckets. The LocalStack CLI utilizes secure S3 presigned URLs to directly interface with the S3 bucket, bypassing the need to transmit the snapshot files through LocalStack’s Platform APIs.
Using the lstk CLI
Section titled “Using the lstk CLI”You can save and load the snapshots to or from your Cloud Pods repository using the lstk snapshot command.
lstk snapshot --helpManage emulator snapshots
Usage: lstk snapshot [flags]
Commands: list List Cloud Pod snapshots available on the LocalStack platform load Load a snapshot into the running emulator remove Delete a cloud snapshot from the LocalStack platform save Save a snapshot of the emulator state show Show metadata for a cloud snapshot versions List the version history of a cloud snapshot
Options: -h, --help help for snapshot
Global Options: --config string Path to config file --endpoint-url string Target an existing, externally-managed emulator at this URL --json Output in JSON format (only supported by some commands) --non-interactive Disable interactive modeSaving a snapshot to Cloud Pods
Section titled “Saving a snapshot to Cloud Pods”The following examples build up a Cloud Pod over three versions, adding one service at a time. Start an emulator instance and create a single S3 bucket:
lstk startlstk aws s3 mb s3://bucket1The command for saving a snapshot to Cloud Pods is similar to saving locally, but instead of a file name, provide the pod: prefix followed by a valid Cloud Pod name.
lstk snapshot save pod:sample-application✔︎ Snapshot saved to pod:sample-application• Version: 1• Services: s3• Size: 64.2 KBYou can access the list of available Cloud Pods, for both you and your organization, using the list command:
lstk snapshot list~ 1 snapshot
NAME VERSION LAST CHANGED sample-application 1 2026-08-04 01:00 UTCWith the save command you can create multiple versions of a Cloud Pod.
For instance, to create an SQS queue and a second version of sample-application:
lstk aws sqs create-queue --queue-name queue-1lstk snapshot save pod:sample-application✔︎ Snapshot saved to pod:sample-application• Version: 2• Services: sqs, s3• Size: 76.0 KBAdding an SNS topic and saving once more produces a third version:
lstk aws sns create-topic --name topic1lstk snapshot save pod:sample-application✔︎ Snapshot saved to pod:sample-application• Version: 3• Services: sqs, sns, s3• Size: 85.4 KBTo review the version history of a Cloud Pod, use the versions command.
Note how each version covers the services that existed in the emulator at the time it was saved:
lstk snapshot versions pod:sample-application~ 3 versions
VERSION CREATED LOCALSTACK SERVICES 3 2026-08-04 01:01 UTC 2026.8.0 sqs, sns, s3 2 2026-08-04 01:00 UTC 2026.8.0 sqs, s3 1 2026-08-04 01:00 UTC 2026.8.0 s3Loading snapshots from a Cloud Pod
Section titled “Loading snapshots from a Cloud Pod”To load a snapshot from a Cloud Pod into a running emulator, use the lstk snapshot load command:
lstk snapshot load pod:sample-application✔︎ Snapshot loaded from pod:sample-application• Services: s3, sns, sqsYou can examine the loaded resources with the lstk status command:
lstk status✔︎ LocalStack AWS Emulator is running• Endpoint: localhost.localstack.cloud:4566• Container: localstack-aws-dev• Version: 2026.8.0• Uptime: 59s~ 3 resources · 3 services SERVICE RESOURCE REGION ACCOUNT S3 bucket1 global 000000000000 SNS topic1 us-east-1 000000000000 SQS http://sqs.us-east-1.localhost.localstack.cloud:4566/000000000000/queue-1 us-east-1 000000000000By default, load fetches the most recent version of the Cloud Pod. To work with an earlier version, append :<version> to the
Cloud Pod name. Before loading, you can inspect the metadata for an older version with the show command:
lstk snapshot show pod:sample-application:1Name sample-applicationVersion 1Created 2026-08-04 01:00 UTCSize 64.2 KBLocalStack 2026.8.0
Services s3As expected, version 1 covers only S3, since the SQS queue and SNS topic were created later.
To load this older version into the running emulator, use the same :<version> suffix with the load command:
lstk snapshot load pod:sample-application:1✔︎ Snapshot loaded from pod:sample-application:1• Services: s3Comprehensive instructions on using the lstk snapshot CLI command are found in the lstk CLI Guide.
Using the LocalStack Console
Section titled “Using the LocalStack Console”The LocalStack Console enables you to:
- Browse your Cloud Pods and access your snapshot version history.
- Save and load snapshots to and from Cloud Pods.
- View snapshot metadata, resources, regions, and version history.
Browse Cloud Pods
Section titled “Browse Cloud Pods”The Cloud Pods Browser allows you to view, manage, and explore your snapshots through the LocalStack Console. With Cloud Pods, you can have individual or shared ownership of snapshots.
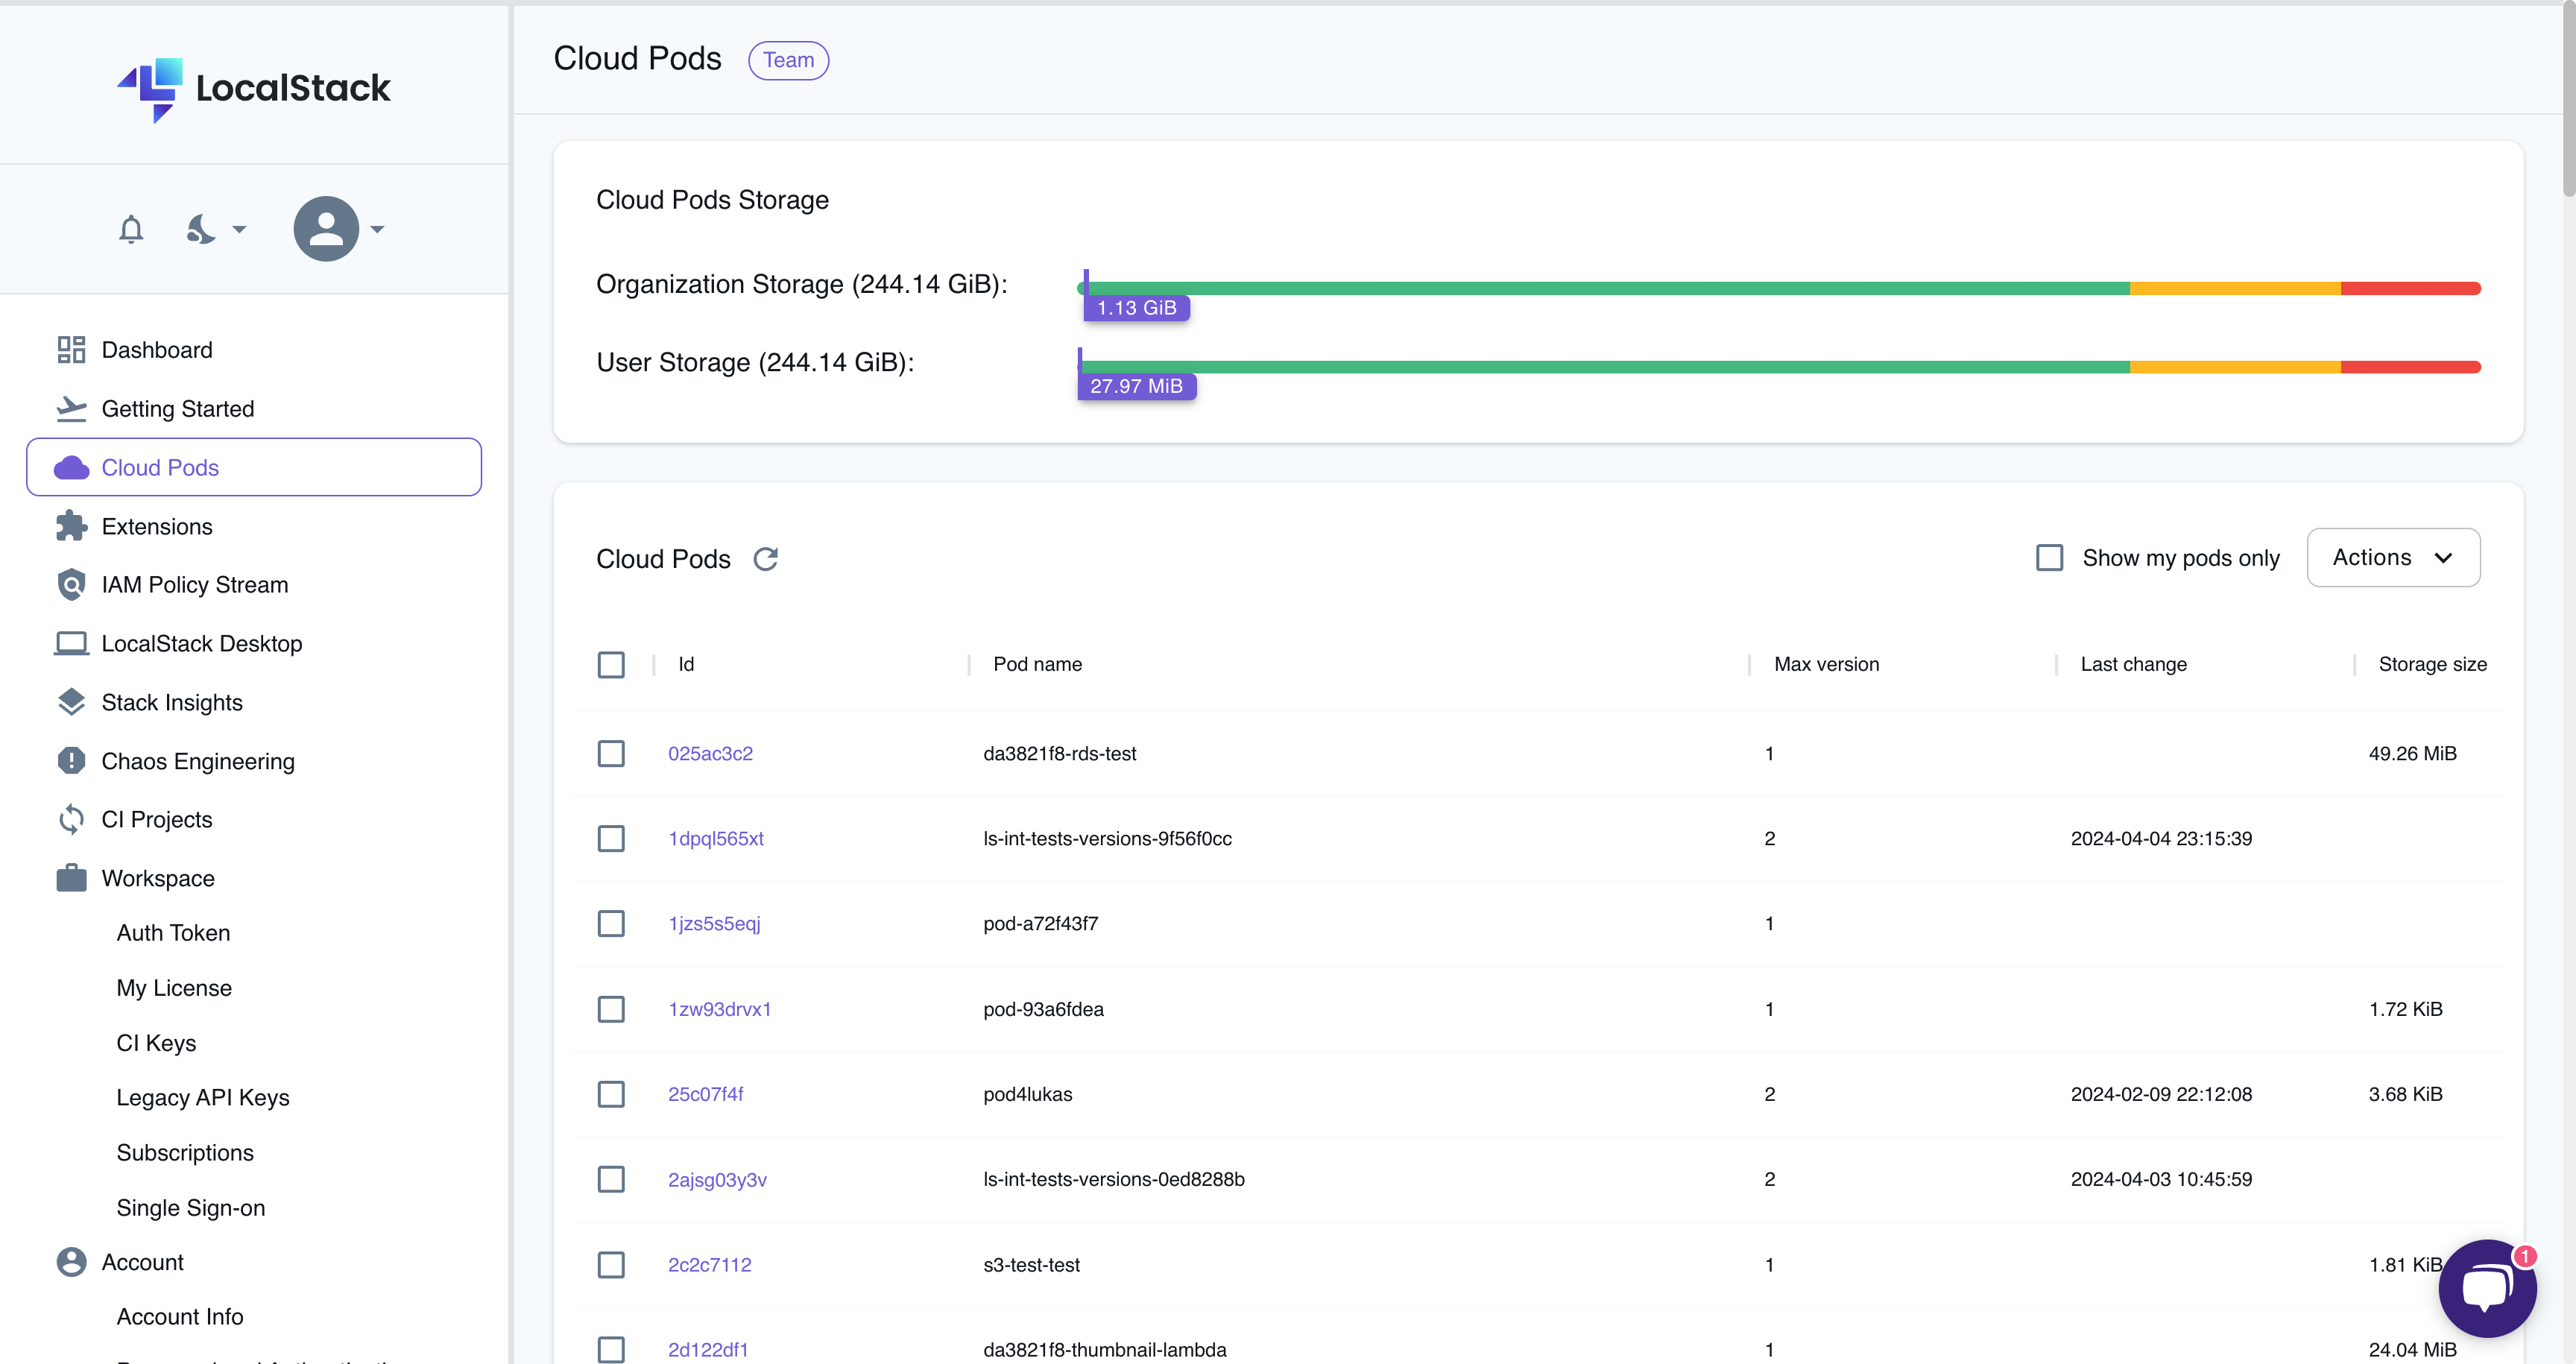
The Cloud Pods Browser provides the following functionality:
- View Cloud Pods: View all snapshots saved by you or your organization.
- View Versions: View the version history of a snapshot and access previous snapshots by clicking on the Cloud Pod’s name.
- View Snapshot Details: View the details of a specific snapshot version by clicking on the version.
- View Cloud Pod storage: View the organization storage usage and user storage usage on top of the Cloud Pods Browser.
- Delete Snapshot: Delete a snapshot by selecting the snapshot and navigating to the Actions button, followed by Delete.
View snapshot metadata
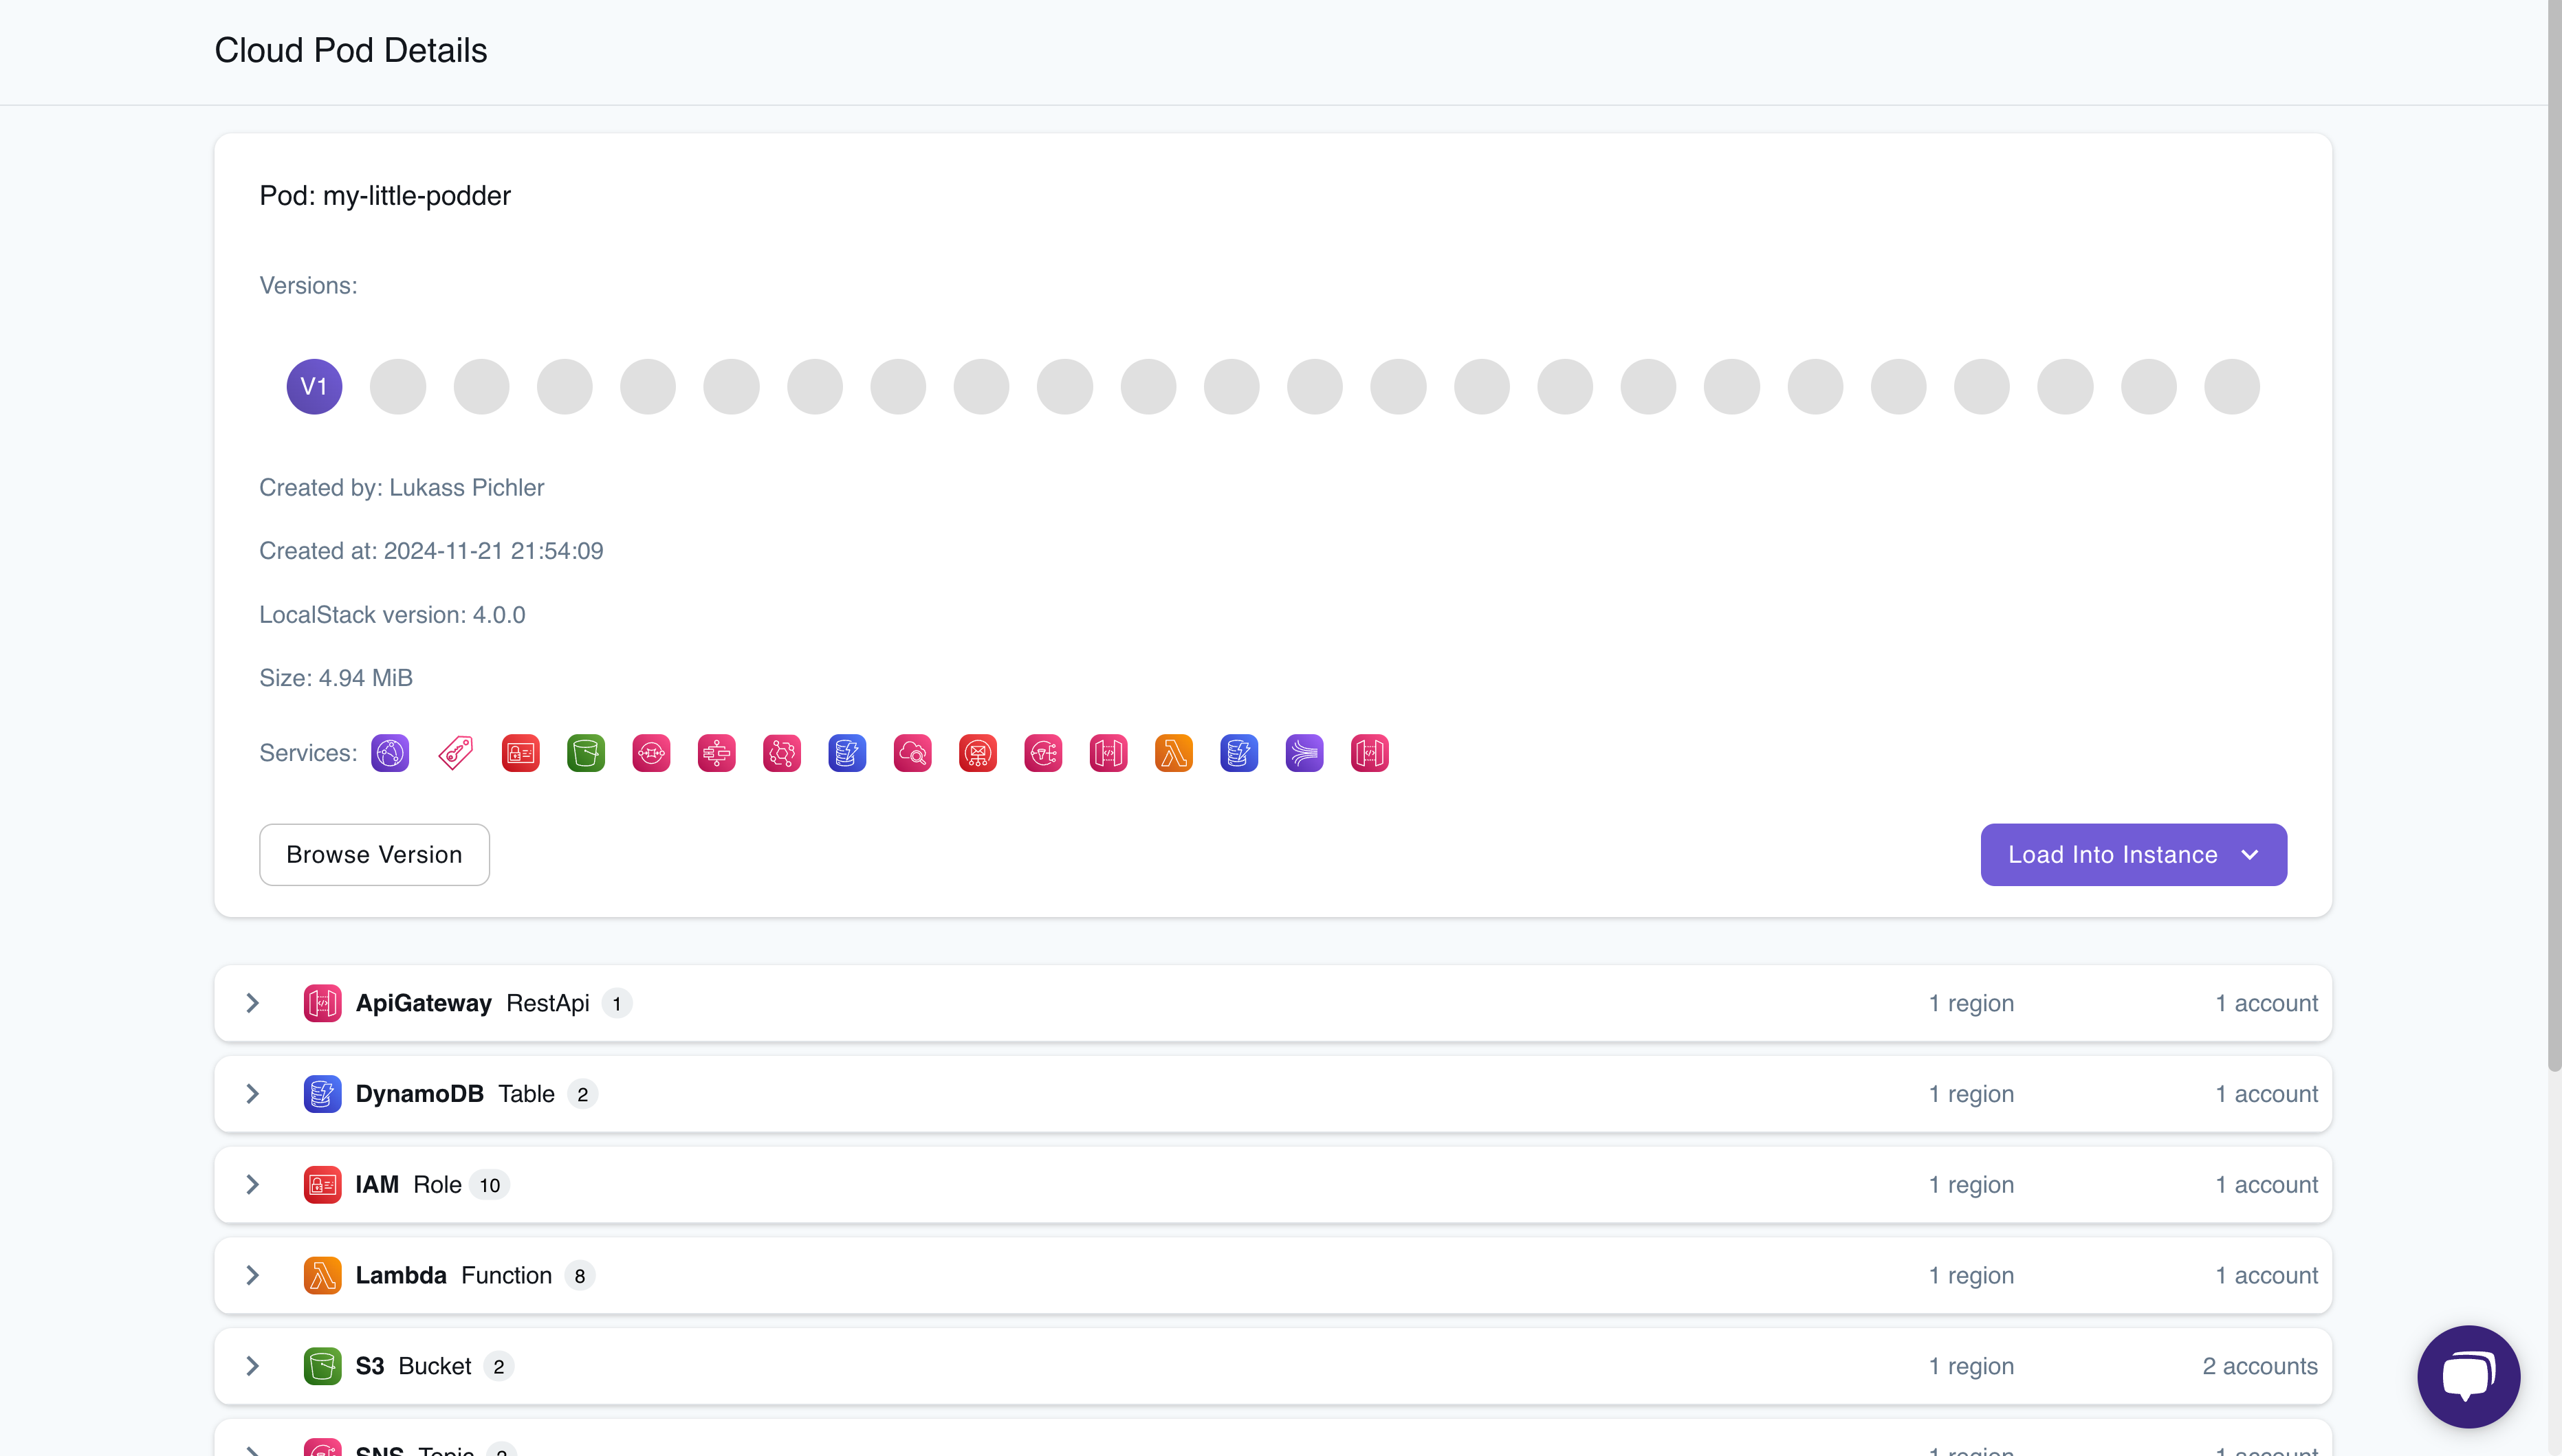
Section titled “View snapshot metadata”You can view snapshot metadata by selecting any snapshot in the Cloud Pods Browser. The metadata includes details such as:
- The user who created the snapshot
- The creation timestamp
- The LocalStack version used to create the snapshot
- The size of the snapshot
- The service resources contained in the snapshot
You can view detailed information within a snapshot, including available resources, categorized services with configurations, and quick access to resource identifiers and endpoints—all without loading the snapshot into your LocalStack runtime.
Save and load snapshots to or from Cloud Pods
Section titled “Save and load snapshots to or from Cloud Pods”You can save and load snapshots using the LocalStack Console. This is useful when you prefer a user-friendly interface, without the need to interact with the CLI.
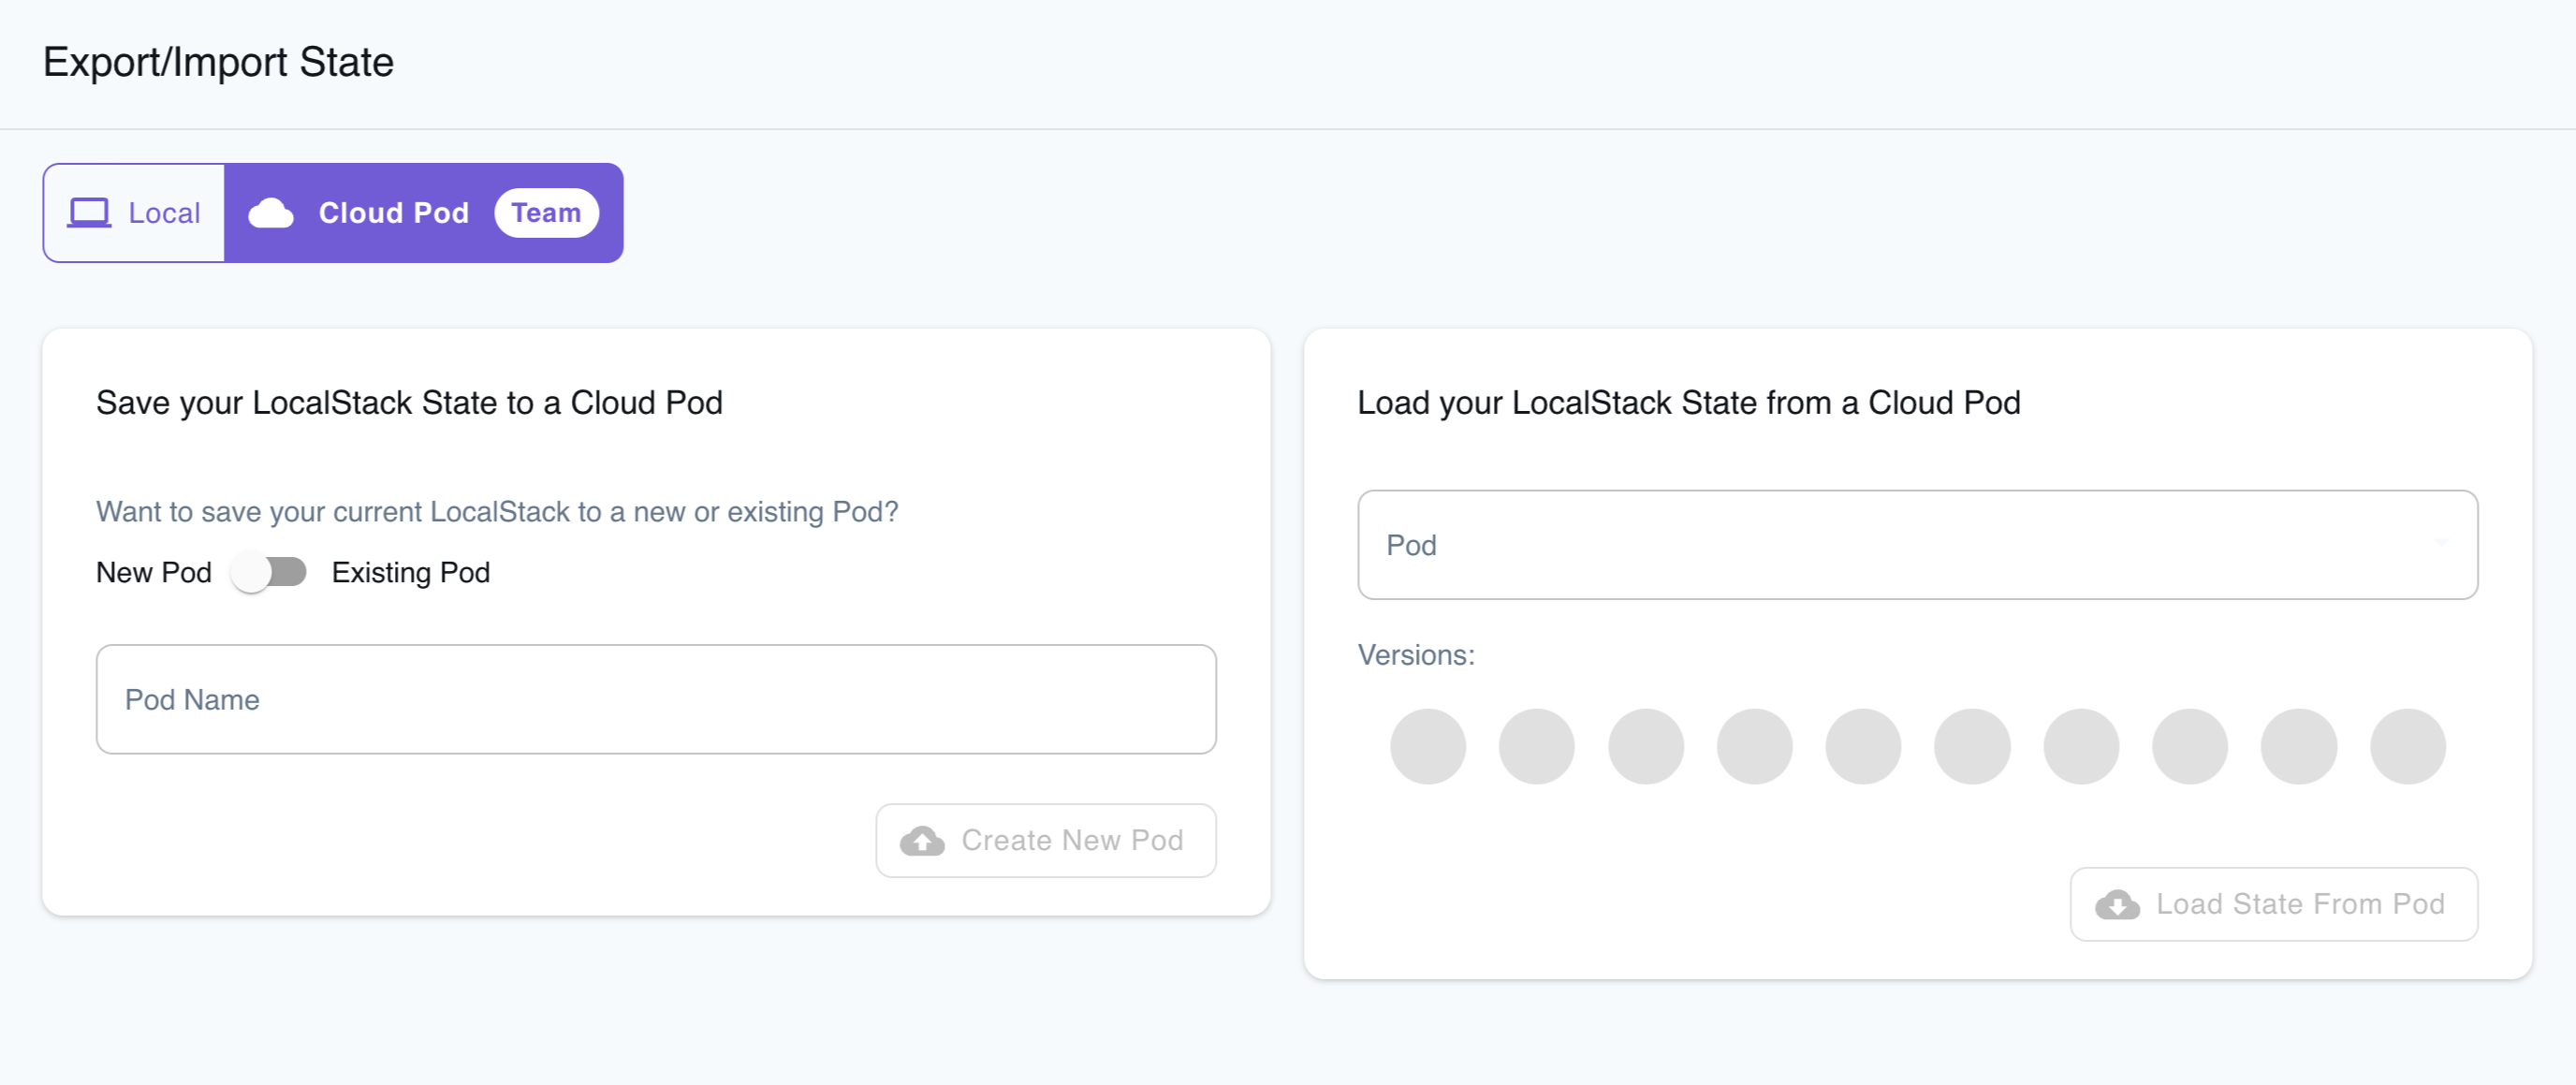
Save the snapshot
Section titled “Save the snapshot”To save a snapshot, follow these steps:
- Navigate to the Cloud tab within the State page.
- Create AWS resources locally as needed.
- Enter the Cloud Pod name and toggle between the New Pod and Existing Pod options.
- Enter the services to save resources for. By default, all available service resources are saved.
- Click on Create New Pod.
A new Cloud Pod will be created, or an existing Cloud Pod will be updated. The snapshot is immediately available for loading into another LocalStack instance. You can check out the list of available Cloud Pods in the Cloud Pods page.
Load the snapshot
Section titled “Load the snapshot”To load a snapshot, follow these steps:
- Navigate to the Cloud tab within the State page.
- Choose the relevant Cloud Pod from the drop-down list.
- Click on Load State From Pod.
To confirm the successful injection of the container state, visit the respective Resource Browser for the services and verify the resources.
Auto Loading from Cloud Pods
Section titled “Auto Loading from Cloud Pods”In addition to loading snapshots through the Command-Line Interface (CLI) or the Console, you can configure the automatic loading of one or more Cloud Pods upon the startup of the LocalStack instance.
The recommended way to automatically load a snapshot from a Cloud Pod at startup is to set the snapshot field in your lstk config.toml.
However, if you run the LocalStack container directly, for example via Docker Compose or docker run, you can instead use the AUTO_LOAD_POD configuration variable.
AUTO_LOAD_POD can accept multiple Cloud Pod names separated by commas.
To autoload multiple Cloud Pods, such as foo-pod and bar-pod, use: AUTO_LOAD_POD=foo-pod,bar-pod.
The order of Cloud Pods in AUTO_LOAD_POD dictates their loading sequence.
When autoloading multiple Cloud Pods, later pods might overwrite the state of earlier ones if they share the same service, account, and region.
Set the snapshot field on the container block in your config.toml to the Cloud Pod’s pod: REF:
[[containers]]type = "aws"port = "4566"snapshot = "pod:foo-pod"lstk startservices: localstack: container_name: "localstack-main" image: localstack/localstack-pro ports: - "127.0.0.1:4566:4566" - "127.0.0.1:4510-4559:4510-4559" environment: - LOCALSTACK_AUTH_TOKEN=${LOCALSTACK_AUTH_TOKEN:?} - DEBUG=1 - AUTO_LOAD_POD=foo-pod,bar-pod volumes: - "./volume:/var/lib/localstack" - "/var/run/docker.sock:/var/run/docker.sock"docker run \ -e LOCALSTACK_AUTH_TOKEN=${LOCALSTACK_AUTH_TOKEN:?} \ -e AUTO_LOAD_POD=foo-pod \ -v ./volume:/var/lib/localstack \ -p 4566:4566 \ localstack/localstack-pro